Back to School: Lunches Made Easy

It’s that time of year again! Summer is over and kids are heading back to school. For many parents, packing your child(ren) a homemade lunch seems like a dreaded task. I totally get it! But today, I’m going to share some tips to make this much easier.
The Lunchbox


First, it starts with the lunchbox. Many years ago, Zoe’s grandma purchased a PlanetBox Rover and it literally changed everything. If you haven’t heard of PlanetBox, we think they are the best lunchboxes available. Yes, they are a little pricey, but worth every penny (and no, this post isn’t sponsored!). Here are a few reasons why:
- The lunchboxes themselves are a guide on how much food to pack. Their are three styles of PlanetBoxes: the Shuttle, the Rover and the Launch. Click here to compare the three and see which one fits your family best. Depending on the age of your child and how much he or she eats, choose the style with the number of compartments that makes the most sense. As Zoe got older and ate more, we still used the Rover, but put her sandwich in a separate sandwich bag. We love using a Stasher Bag and Lunchskins.
- They are eco-friendly, nontoxic and built to last. Each box is made from high quality stainless steel and free from BPA, phthalates, and lead. They are non-leaching and dishwasher friendly. Like I said, we have had ours for about 4 years and it is still in perfect condition!
- This is the fun part – they are customizable! You and your child can choose magnets that stick on the front of the box, making lunchtime way more fun!
If the PlanetBox doesn't fit your budget, there are plenty of other ones out there, like this one, this one and this one. UPDATE: We recently picked up the Pack It lunch boxes and love them! You put them in the freezer at night and it keeps your lunch cool all day long! Thanks to @shutthekaleup for the recommendation! The Planetbox Rover won't fit inside very securely, so instead we switched over to the LunchBots bento box.
NEW! We came across the Austin Baby Co Bento Boxes and they are just to die for! So cute! Plus, they are 100% food grade silicone.
The Food
Ok, so now let’s talk food! When I’m shopping for lunches for the week at the grocery store, I’ll visualize the lunchbox and the different compartments. Here’s how it goes down:
- I’ll grab two fruits (preferably organic) – think blueberries, strawberries, apples, grapes, pears, etc.
- I’ll grab two veggies (preferably organic) – like baby carrots, cucumbers, bell peppers, baby tomatoes, etc.
- For protein, I’ll grab some lunch meat, chicken breast, raw cheddar cheese, beans, seeds, eggs (to make hard boiled eggs), etc.
- I’ll select a few other items like crackers (we love the Simple Mills brand), chips (we love Siete chips!), fruit snacks (Soley fruit snacks are great!), a snack bar (the Made Good bars are one of our favorites, plus they are nut free), or a treat like cookies, gummy bears, jelly beans or natural M&Ms. You can find all of these at Whole Foods or other natural grocers. In the Planetbox Rover, there is a tiny compartment in the middle that fits a few of these little goodies perfectly, and it also makes the kids so happy to see a little treat when they opens their lunch at school. :)
- Finally, I’ll get sandwich bread and a few fixings like granola butter (nut free!) and jelly, or turkey, lettuce and cheese, etc. Or I might use these tortillas and make a wrap!
The Packing
In the morning, you’ll fill each compartment with all the yummies you bought at the store. It literally takes five minutes or less. Just make a quick sandwich and you’re done!
Don’t forget, leftovers are perfect for lunches, and they save you money! I’ll often pack leftovers like pasta, meat/fish, cooked veggies, or rice... anything, really!
Here are a few gorgeous lunch examples from some of our favorite mamas, Catherine of Weelicious, Alex of The Defined Dish, Gillian of Lala Lunchbox, Linda of The Organic Kitchen:
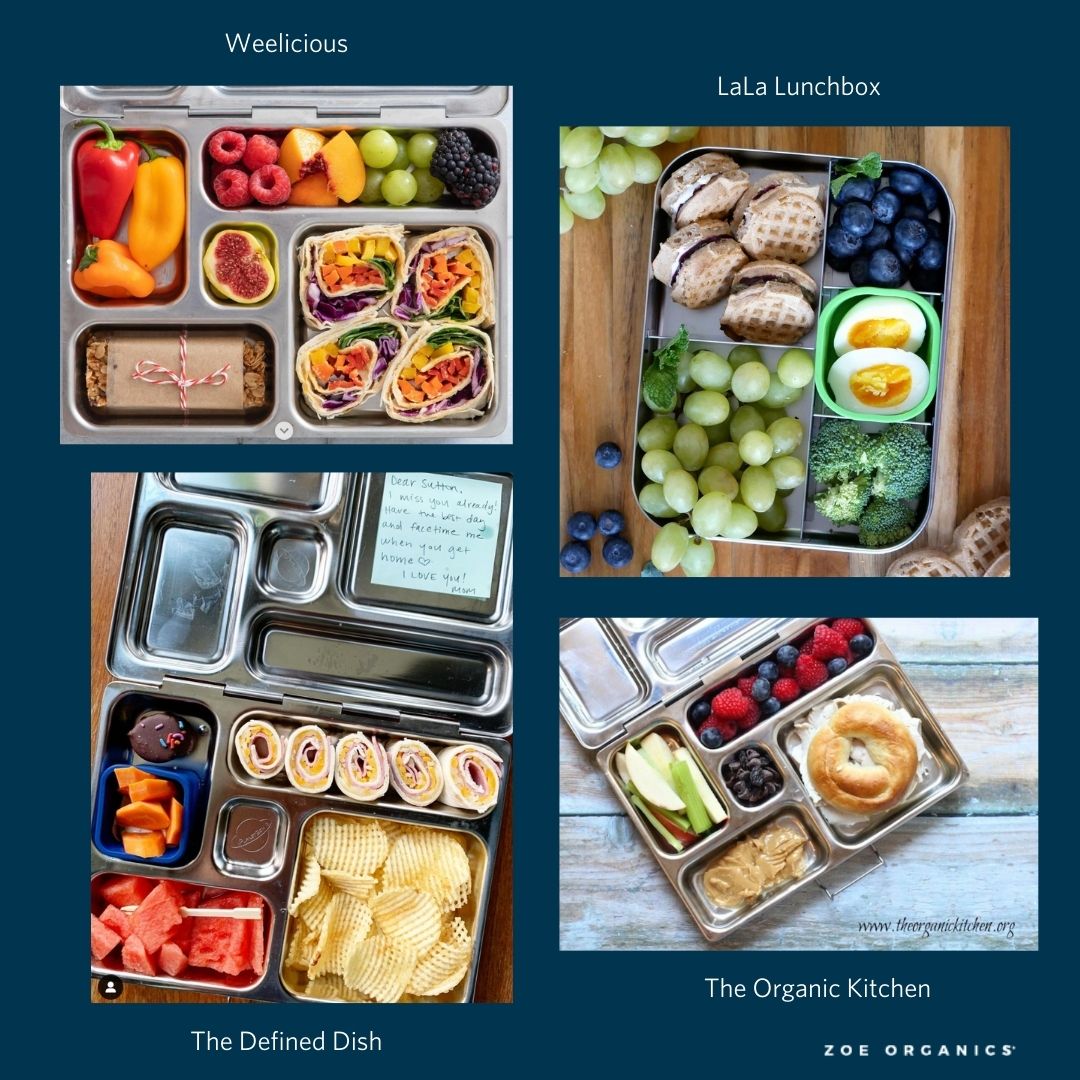
Of course, you don’t have to make it super fancy like these photos(!), but you can absolutely make lunches a fun task, or keep it simple. Whatever suits you!
The Beverage
The last thing I want to talk about is water. The best drink to pack with your child’s lunch is a big, reusable bottle of filtered water. Skip the juice and soda, guys! They don't need the extra sugar from a juice box. Especially in the Fall and Winter months when we need to take extra care of our bodies!
Speaking of filtered water, do you ever think about what is in the water fountains at school? Depending on where you live, tap water can hold a scary amount of contaminants like lead, Chromium-6, 1,4-dioxane and nitrates. Yikes!! (Read more here.) We believe in using high-quality water filters – some of us here at Zoe Organics have the Berkey Filter or the Aquasana Whole House Filter.
Here are a few of our favorite, non-toxic reusable water bottles:
So there you go! By packing a lunch for your child each day, you’re filling their tummies with fresh fruits and veggies, homemade sandwiches and/or leftovers and skipping the processed lunches at school. You’re saving money in the long run by using a reusable lunch box and water bottle, and by not purchasing a hot lunch (which really adds up!) – plus you’re being environmentally friendly.
Are you ready to make the switch? Let us know in the comments below! And if you're looking for some more school lunch inspiration, check out Weelicious' School Lunch Inspiration, The Defined Dish Back to School Lunch Round-up, Gillian at Lala Lunchbox, and The Organic Kitchen’s More Real Food Lunch Ideas For Back To School ~ Pre-k Friendly!. Happy lunching!
Leave a comment